How to Create a Date Picker in Google Sheets
Google Sheets is a versatile tool that supports various data types. One such data type is dates, which you can type in manually, or, better, using a date picker. A date picker, also known as a date selector or calendar dropdown, helps inputting dates correctly and consistently.
Read this comprehensive guide to managing dates and times in Google Sheets, from basic functions to advanced recipes for real-world applications.
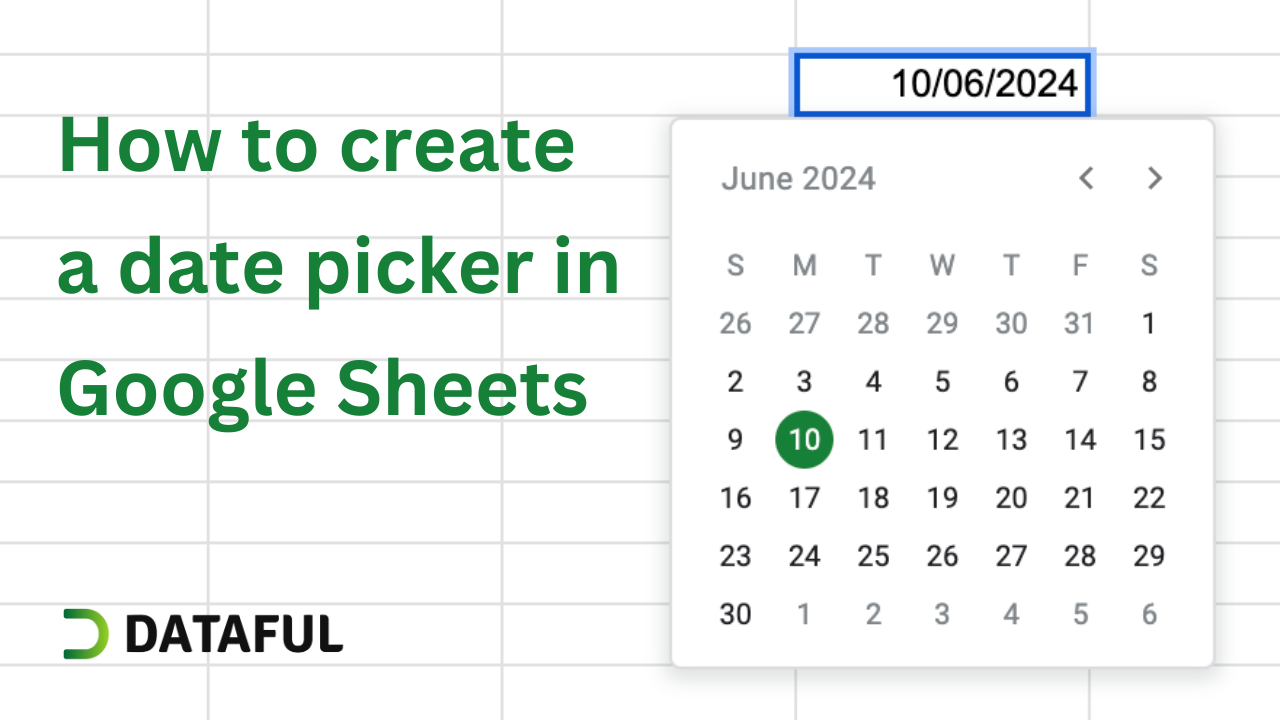
Here’s how you can create a date picker in Google Sheets:
Step 1: Select the Cell(s)
Click on the cell or select the range of cells where you want to enable the date picker.
Step 2: Navigate to Data Validation
To open Data Validation section either:
- go to the Data menu, and then click on Data validation, or
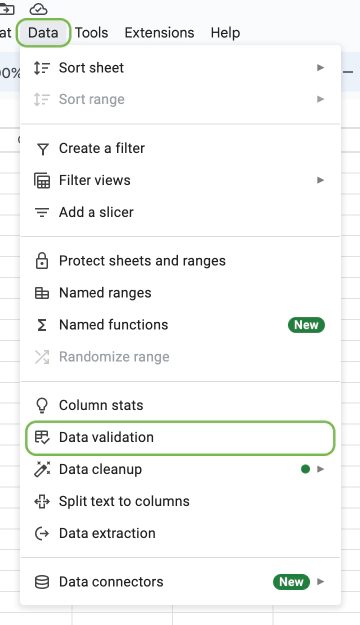
Open data validation section from the main menu - right click on the selected cell(s), hover over View more cell actions, and select Data validation.
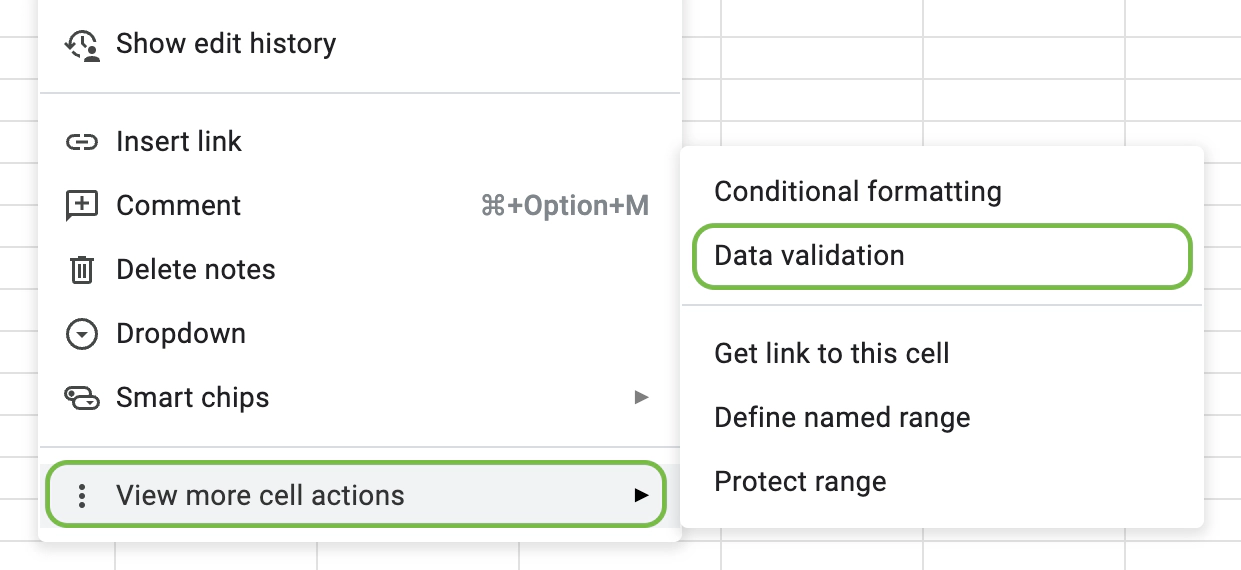
Open data validation section from the context menu
Step 3: Create Data Validation Rule
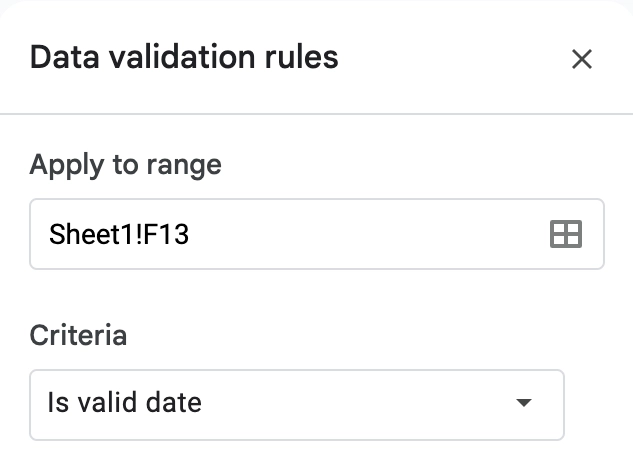
Click on + Add Rule then in the Criteria dropdown select Is a valid date. If the cell should have constrains on the date, you can select any other option: Date is before, Date is between, etc.
Step 4: Customize Validation Behavior (Optional)
Click on Advanced options to set help text displayed to the user if the data is invalid and how should the validation look like: show a warning or reject the input altogether.
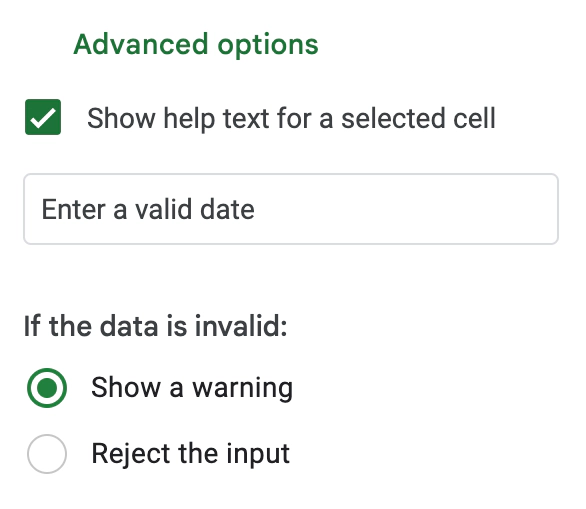
At the moment of writing, Google Sheets displays that help message only why validation is in the rejection mode.

Step 5: Save
Click on Save to apply the data validation to the selected cells. Now, whenever you or someone double clicks on the cell(s), a date picker will appear to help select a date.
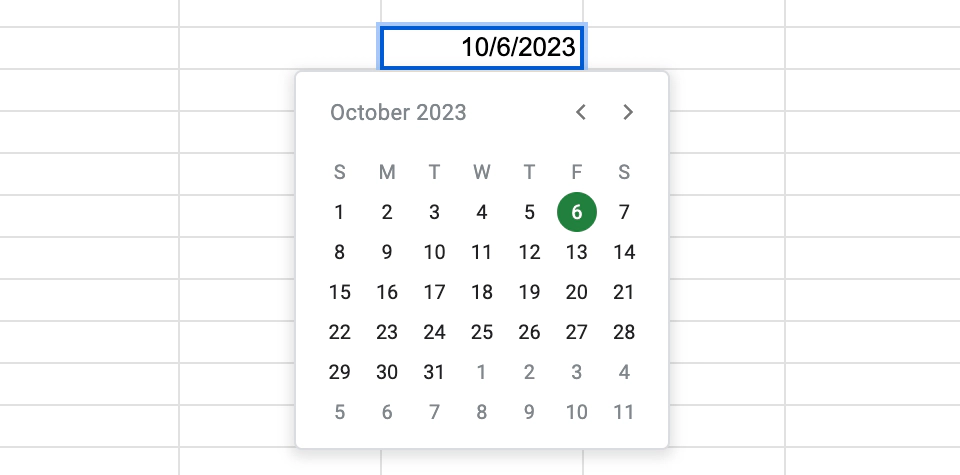
The date picker in Google Sheets is a straightforward yet powerful tool to standardize date input, ensuring data consistency across your sheets. By following the above steps, you can easily implement a date picker in your Google Sheets, enhancing the usability and accuracy of date-related data entries.